Introduction
If you want to learn more about CloudFormation, or have an existing AWS resources that you want to be managed by CloudFormation. Go ahead and read on!
In this post, we’ll be covering how to bring manually created resources of AWS Global Accelerator service into CloudFormation management using Resource Import feature of CloudFormation.

Q. Why not just re-create it from scratch using CloudFormation? Unfortunately, when Global Accelerator is provisioned it associates a set of Static IPs. If we re-create it then a set of new Static IPs will be associated, and we’ll have to update DNS in the process, which we do not want.
If you are unfamiliar with AWS Global Accelerator. Learn more about it here.
Bringing Into CloudFormation Management
AWS CloudFormation provides following Global Accelerator Resource Types:
In other to bring existing resources under CloudFormation management, we need:
A template that describes the resource we are importing. For us, we will be creating a new template using above resources.
Identifiers for the resources to import. For us, we’ll be using ARN as identifiers of our existing resources.
Let’s connect each resource type to our existing Global Accelerator resources and bring them together as a part of one CloudFormation stack.
AWS::GlobalAccelerator::Accelerator
Let’s start-off by importing the following manually created Accelerator resource into a new CloudFormation stack.
 Fig: Global Accelerator resource created outside of CloudFormation
1) Create new template
Save the following template content as global-accelerator.yaml. The resource properties values must be identical to existing resource.
NOTE: Import operation doesn’t allow adding new resources, deleting existing resources or changes to resources properties.
- In line #13: Setting “DeletionPolicy” is mandatory when importing resource.
AWSTemplateFormatVersion: "2010-09-09"

Parameters:
  EnvironmentLabel:
    Type: String

  EnvironmentType:
    Type: String

Resources:
  Accelerator:
    Type: "AWS::GlobalAccelerator::Accelerator"
    DeletionPolicy: "Retain"
    Properties:
      Enabled: true
      IpAddressType: "IPV4"
      Name: !Sub "${EnvironmentLabel}-${EnvironmentType}-accelerator"
      Tags:
        - Key: "EnvironmentLabel"
          Value: !Ref EnvironmentLabel
        - Key: "EnvironmentType"
          Value: !Ref EnvironmentType
2) Create new stack
Goto AWS CloudFormation Dashboard and click on Create stack / With existing resources (import resources)
NOTE: AWS Global Accelerator is currently only supported in us-west-2 region.
 Fig: Create a new stack with existing resources
3) Upload the template
Let’s upload the new template containing Accelerator resource.
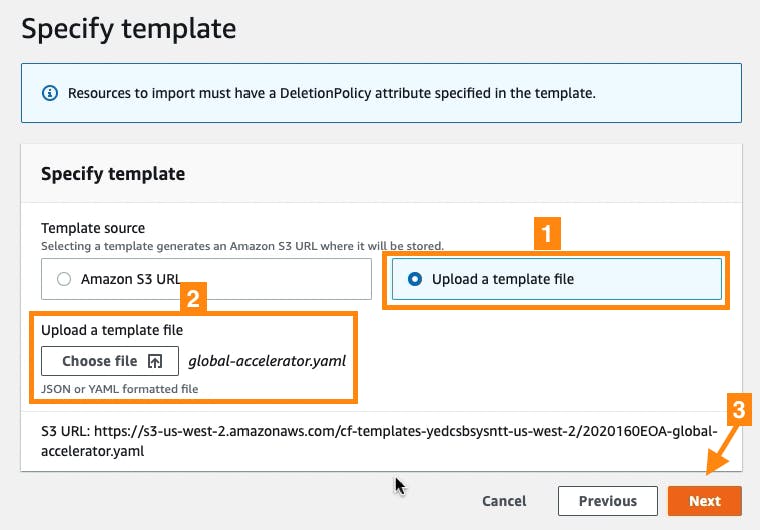 Fig: Upload new template
4) Specify the ARN
Copy the ARN of existing Global Accelerator resource from Global Accelerator Dashboard and paste it here.
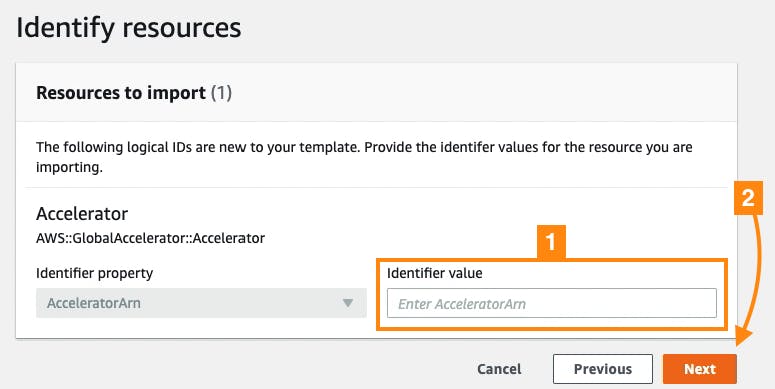 Fig: Provide ARN of existing Global Accelerator resource
5) Stack name and Parameters
Let’s name the new stack and provide stack parameters, eg:
Stack name: frontend-production-accelerator
Environment Label: frontend
Environment Type: production
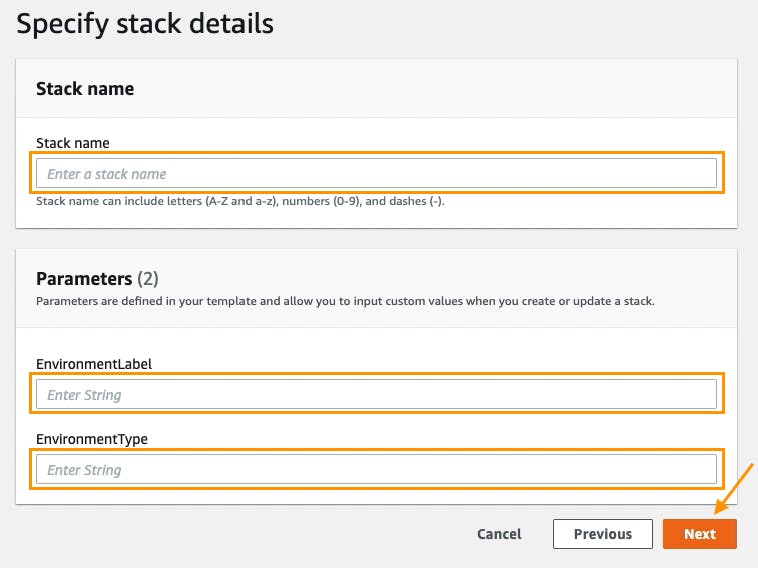 Fig: Provide stack name and parameters
6) Review and Import
AWS CloudFormation will look up the specified ARN, and lists them in the “Changes” section. Go ahead and click “Import resources”.
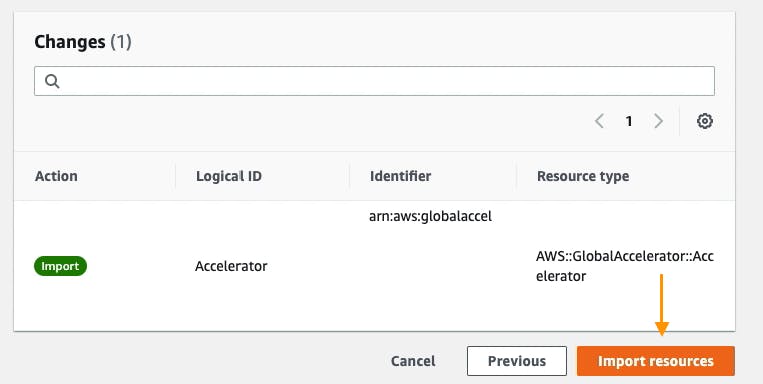 Fig: Review and Import resources
After a couple of minutes, Stack Status will show IMPORT_COMPLETE as shown below.
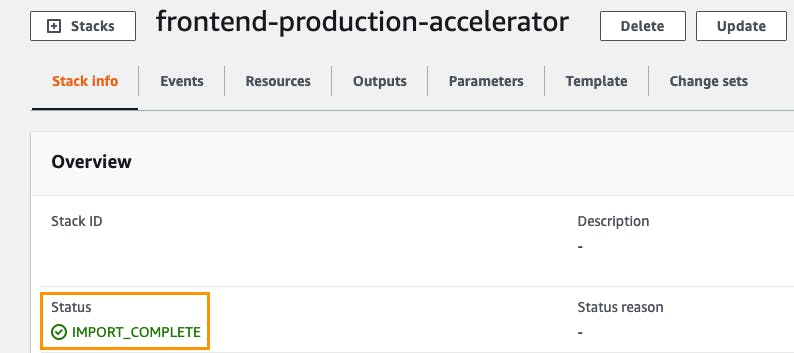 Fig: Resource import complete
NOTE: CloudFormation doesn’t yet support Drift detection for AWS Global Accelerator resources.
AWS::GlobalAccelerator::Listener
Let’s now import the following Listener resource into an existing CloudFormation stack.
 Fig: Listener resource created outside of CloudFormation
1) Update existing template
Add the new Listener resource as shown below. The resource properties values must be identical to existing resource.
- In line #26: Setting “DeletionPolicy” is mandatory when importing resource.
AWSTemplateFormatVersion: "2010-09-09"

Parameters:
  EnvironmentLabel:
    Type: String

  EnvironmentType:
    Type: String

Resources:
  Accelerator:
    Type: "AWS::GlobalAccelerator::Accelerator"
    DeletionPolicy: "Retain"
    Properties:
      Enabled: true
      IpAddressType: "IPV4"
      Name: !Sub "${EnvironmentLabel}-${EnvironmentType}-accelerator"
      Tags:
        - Key: "EnvironmentLabel"
          Value: !Ref EnvironmentLabel
        - Key: "EnvironmentType"
          Value: !Ref EnvironmentType

  ListenerHttpHttps:
    Type: "AWS::GlobalAccelerator::Listener"
    DeletionPolicy: "Retain"
    Properties:
      AcceleratorArn: !GetAtt Accelerator.AcceleratorArn
      ClientAffinity: "NONE"
      PortRanges:
        - FromPort: 80
          ToPort: 80
        - FromPort: 443
          ToPort: 443
      Protocol: "TCP"
2) Modify the stack
Goto AWS CloudFormation Dashboard and select the newly created stack and then click on Stack action / import resources into stack.
 Fig 1: Import resources into existing stack
3) Upload the template
Let’s upload the updated template with Listener resource.
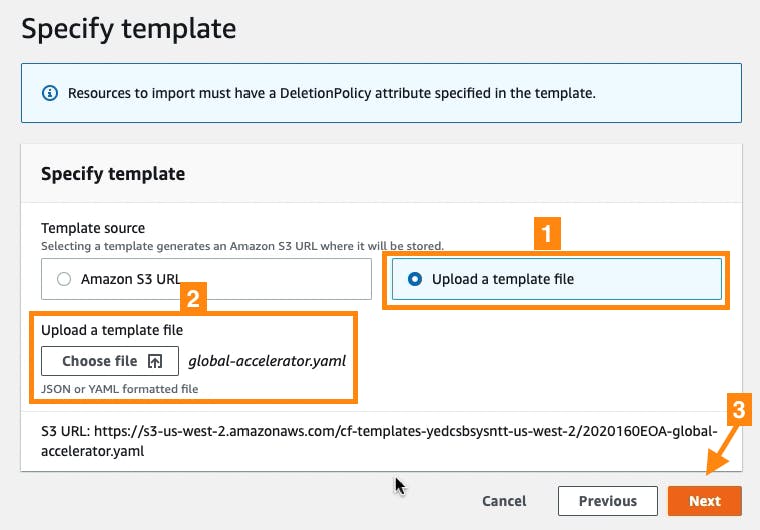 Fig: Upload new template
4) Specify the ARN
Copy the ARN of existing Listener resource from Global Accelerator Dashboard and paste it here.
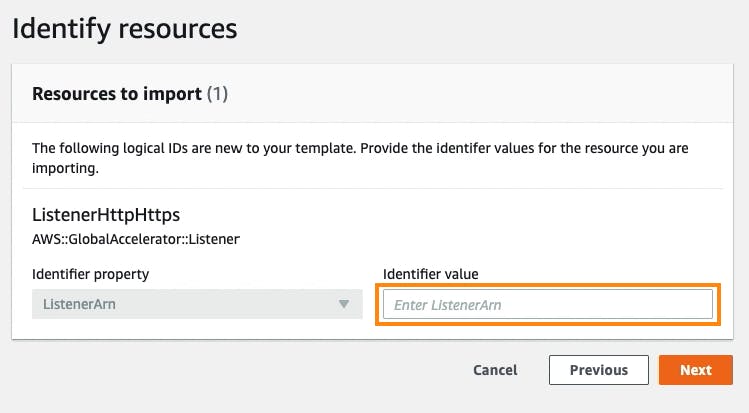 Fig: Provide ARN of existing Global Accelerator Listener resource
5) Review and Import
Go ahead and click “Import resources”.
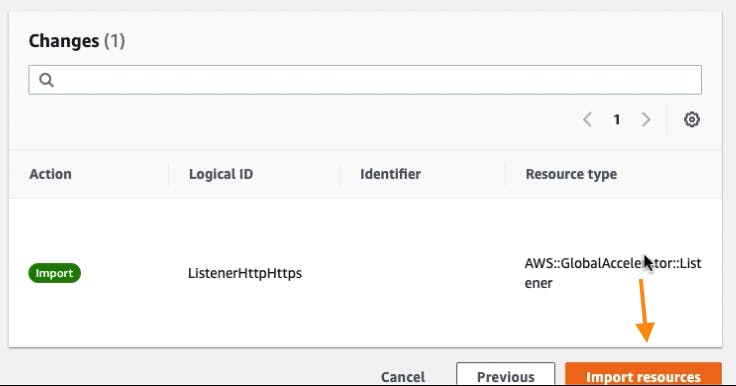 Fig: Review and Import resources
After a couple of minutes, Stack Status will show IMPORT_COMPLETE as shown below.
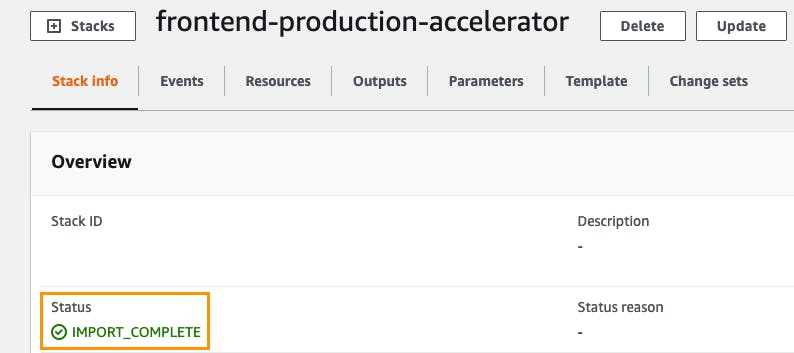 Fig: Resource import complete
AWS::GlobalAccelerator::EndpointGroup
Finally. Let’s wrap up by importing Endpoint Group resource into an existing CloudFormation stack.
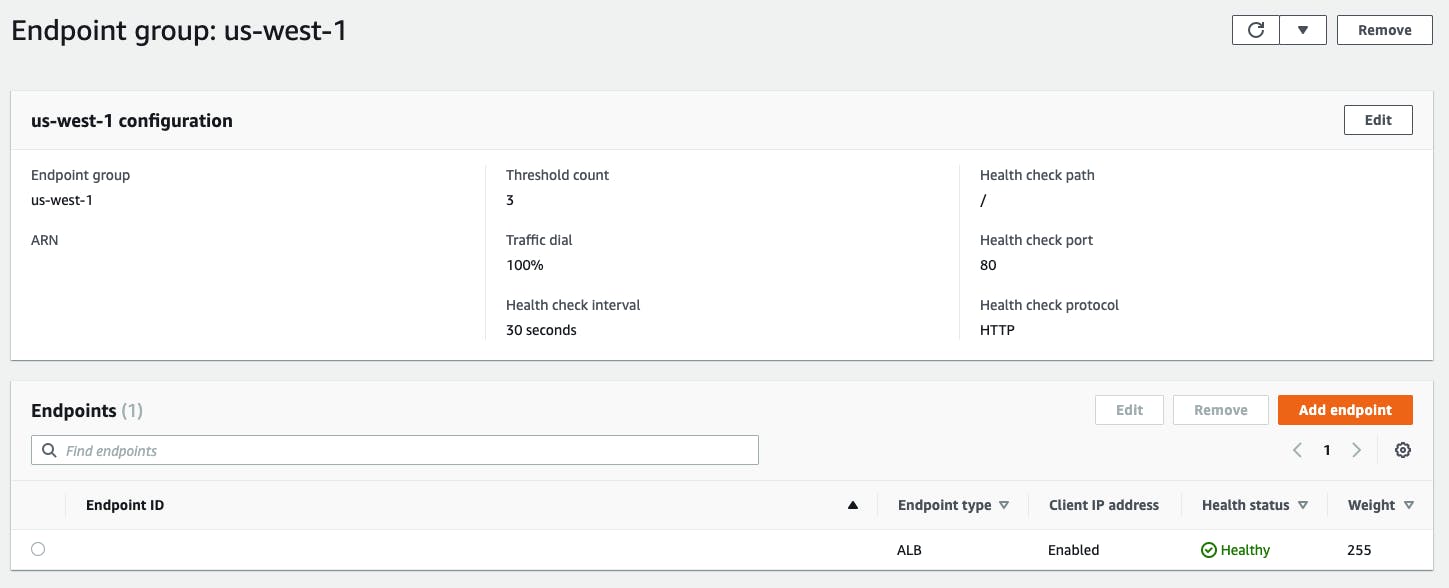 Fig: Global Accelerator Endpoint Group created outside of CloudFormation
1) Update existing template
Add the new EndpointGroup resource as shown below. The resource properties values must be identical to existing resource.
In line #39: Setting “DeletionPolicy” is mandatory when importing resource.
In line #44: Replace “EndpointId” with an ARN of AWS ALB, NLB or EC2 as configured in the existing resource.
NOTE: CloudFormation doesn’t yet support importing AWS ALB/NLB resource.
AWSTemplateFormatVersion: "2010-09-09"

Parameters:
  EnvironmentLabel:
    Type: String

  EnvironmentType:
    Type: String

Resources:
  Accelerator:
    Type: "AWS::GlobalAccelerator::Accelerator"
    DeletionPolicy: "Retain"
    Properties:
      Enabled: true
      IpAddressType: "IPV4"
      Name: !Sub "${EnvironmentLabel}-${EnvironmentType}-accelerator"
      Tags:
        - Key: "EnvironmentLabel"
          Value: !Ref EnvironmentLabel
        - Key: "EnvironmentType"
          Value: !Ref EnvironmentType

  ListenerHttpHttps:
    Type: "AWS::GlobalAccelerator::Listener"
    DeletionPolicy: "Retain"
    Properties:
      AcceleratorArn: !GetAtt Accelerator.AcceleratorArn
      ClientAffinity: "NONE"
      PortRanges:
        - FromPort: 80
          ToPort: 80
        - FromPort: 443
          ToPort: 443
      Protocol: "TCP"

  EndpointGroup:
    Type: "AWS::GlobalAccelerator::EndpointGroup"
    DeletionPolicy: "Retain"
    Properties:
      EndpointConfigurations:
        - ClientIPPreservationEnabled: true
          # REPLACE THE ENDPOINT ID WITH ALB/NLB ARN
          EndpointId: ""
          Weight: 255
      EndpointGroupRegion: "us-west-1"
      HealthCheckIntervalSeconds: 30
      HealthCheckPort: 80
      HealthCheckProtocol: "HTTP"
      ListenerArn: !GetAtt ListenerHttpHttps.ListenerArn
      ThresholdCount: 3
      TrafficDialPercentage: 100.0
2) Modify the stack
Goto AWS CloudFormation Dashboard and select the previously created stack and then click on Stack action / import resources into stack.
 Fig 1: Import resource into stack
3) Upload the template
Let’s upload the updated template with EndpointGroup resource.
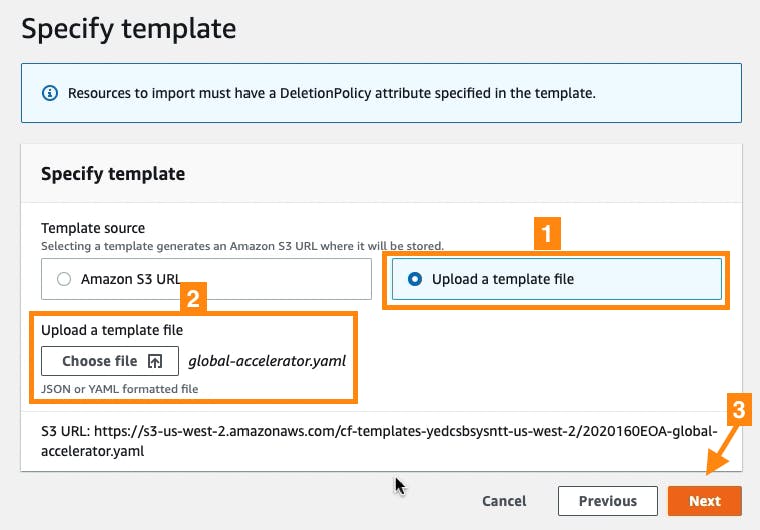 Fig: Upload new template
4) Specify the ARN
Copy the ARN of existing EndpointGroup resource from Global Accelerator Dashboard and paste it here.
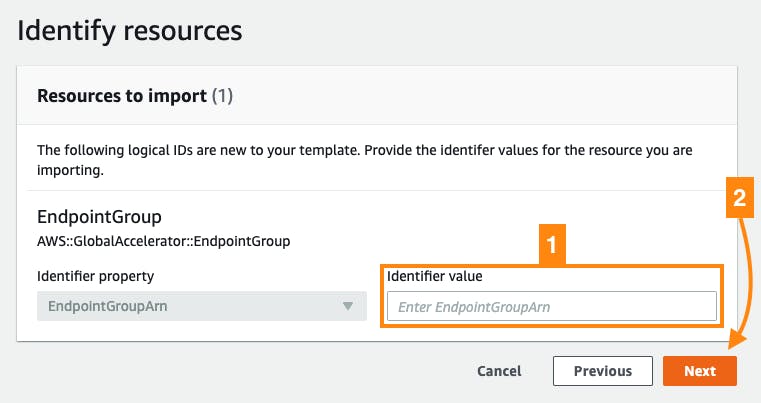 Fig: Provide ARN of existing Global Accelerator EndpointGroup resource
5) Review and Import
Go ahead and click “Import resources”.
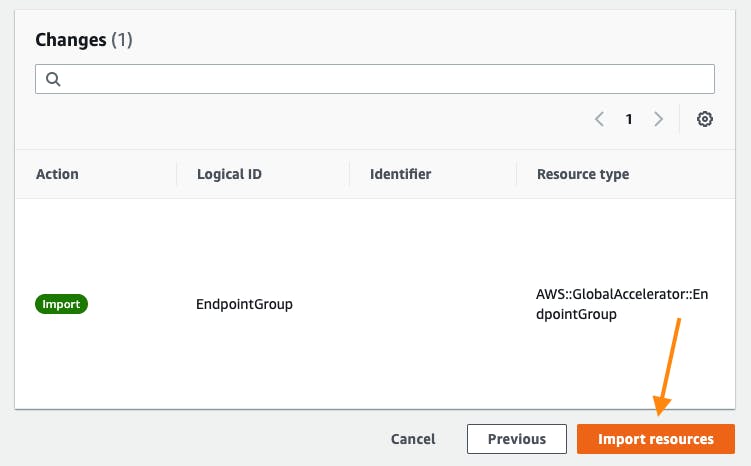 Fig: Review and Import resources
After a couple of minutes, Stack Status will show IMPORT_COMPLETE as shown below.
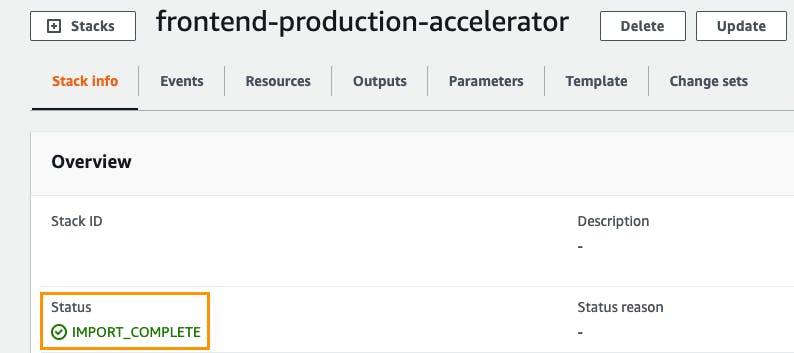
Yay!
All of the existing manually created resources has been imported into CloudFormation. Clicking on the “Resources” tab will list all of the resources currently managed by this CloudFormation stack.
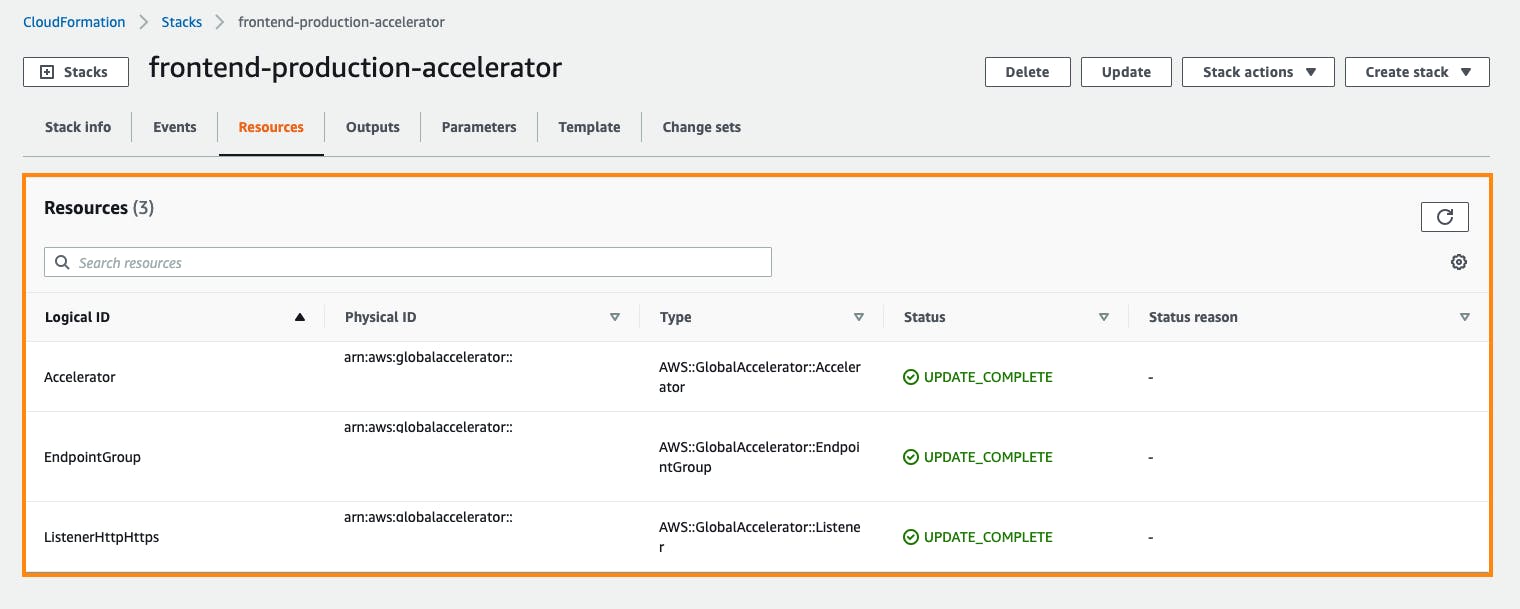 Fig 1: List of Resources managed by CloudFormation
Summary
In this post, we used AWS Global Accelerator as an example. And, there are many other resources that supports Resource Imports. Click here to see the full list.
However, not all resources are supported by CloudFormation Resource Import. If you still have manually created resources that aren’t yet supported, then there’s no way to manage it via CloudFormation other than to re-create it from scratch or wait for AWS to announce it’s support.

